Hi friends! Glad you stopped by today, and hope you find some inspiration from this last minute entryway closet renovation project!
I woke up a couple Saturdays ago and found out that our plans for the day were cancelled. It is very rare to have a whole Saturday morning/afternoon free, so I immediately started thinking of what project I could accomplish within a few hours. I then walked through my entryway and saw all the shoes on the floor and suddenly knew I needed to spend that day renovating the entryway closet; a job I had been wanting to do since we first moved in.
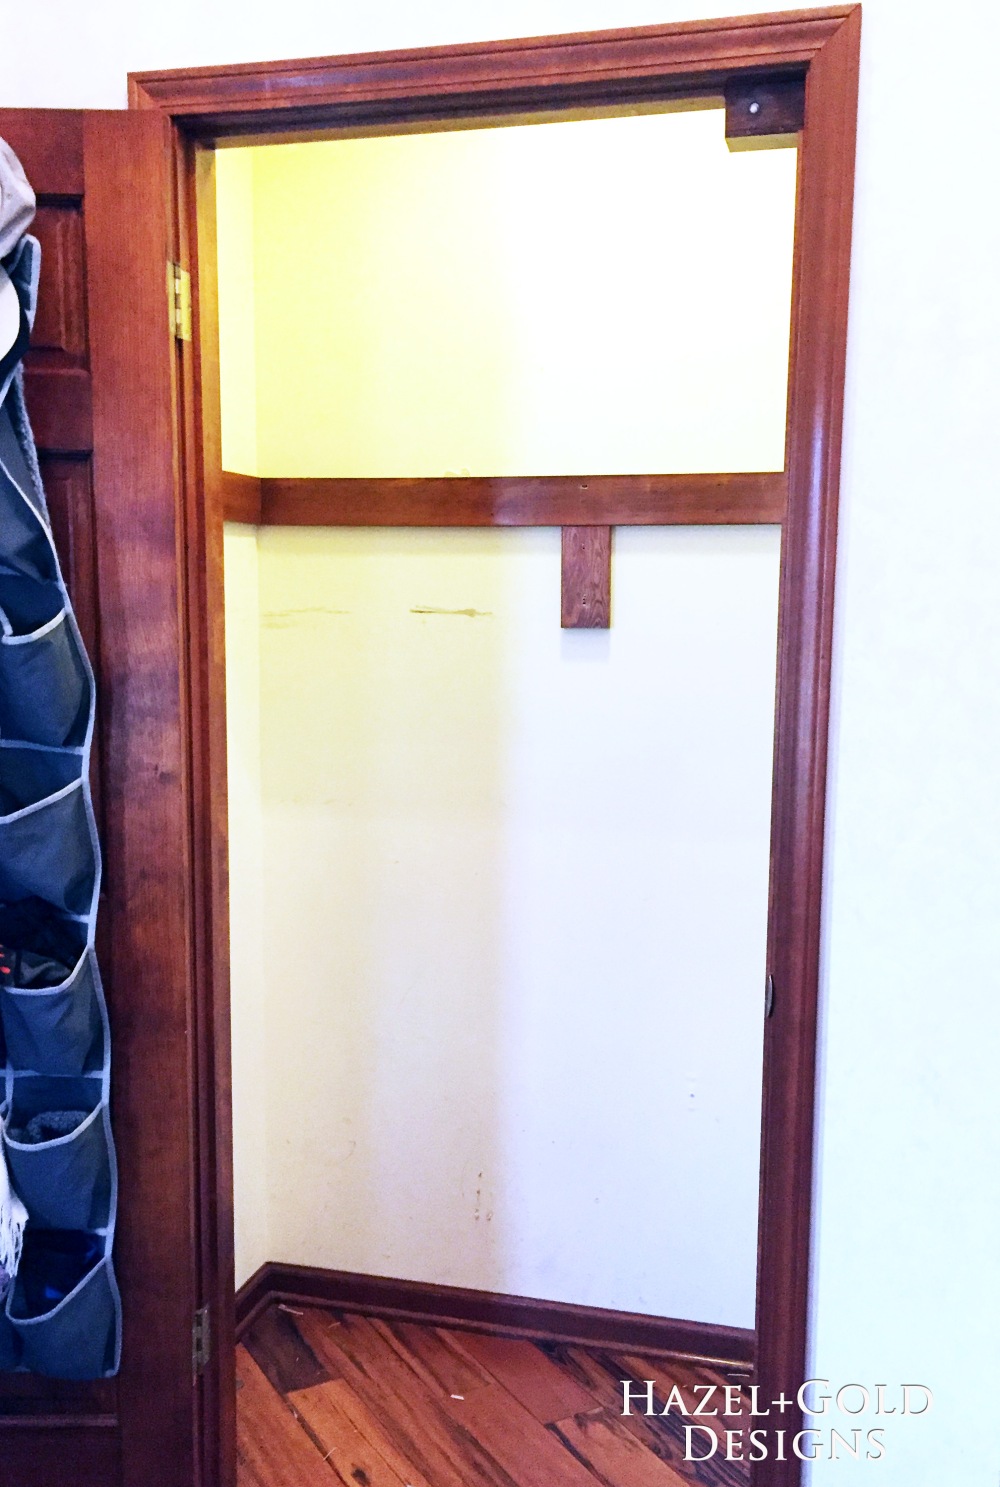
Here is the before photo with all our glorious mess:

It wasn’t an awful closet, but it’s fairly small and the issues we had with it were:
- The shoes were always everywhere and it took forever to dig through the baskets to find a pair.
- No one, including myself, likes hanging up coats on hangers, so often they’d just be piled on the couch outside the other door, or thrown on top of the shoe baskets in this closet.
- A bunch of wasted space in the top of the closet.
- Nowhere for the little kids who can’t reach the hangers to hang up their coats.
Alright, so my main goal was to eliminate all of these problems, but also to spend NO money. I had already purchased coat hooks a few months ago for $12 total, in anticipation of doing this some day, but I knew I probably had enough scrap wood in my shop to make this work without buying anything else.
Here’s how I did:
The first thing we did was remove everything. All of the coats, shoes, hats, etc. and the closet rod and shelf. It took about 10 minutes. Love demo!
Next, we measured our tallest shoes, which happened to be my husband’s workboots, and marked the first shelf just above that height. This will allow for us to fit boots and shoes in the closet.
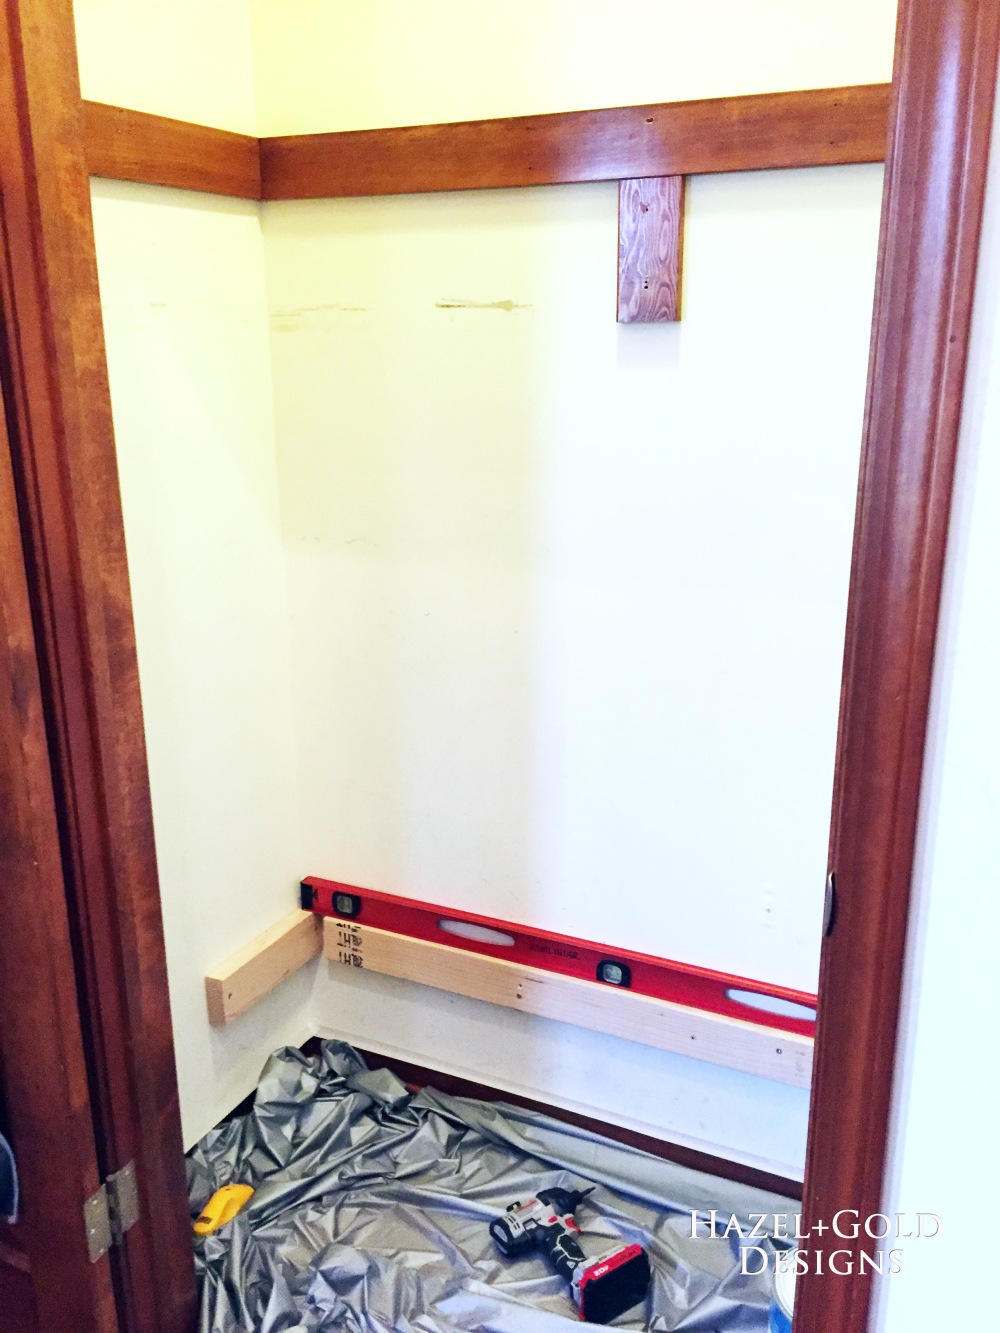
Next, we measured our largest tennis shoes, and did the same thing, measuring and marking where we wanted the top shelf.

We installed supports for both of the shelves on each side and along the back, making sure they were level and securing them in the studs with long screws.
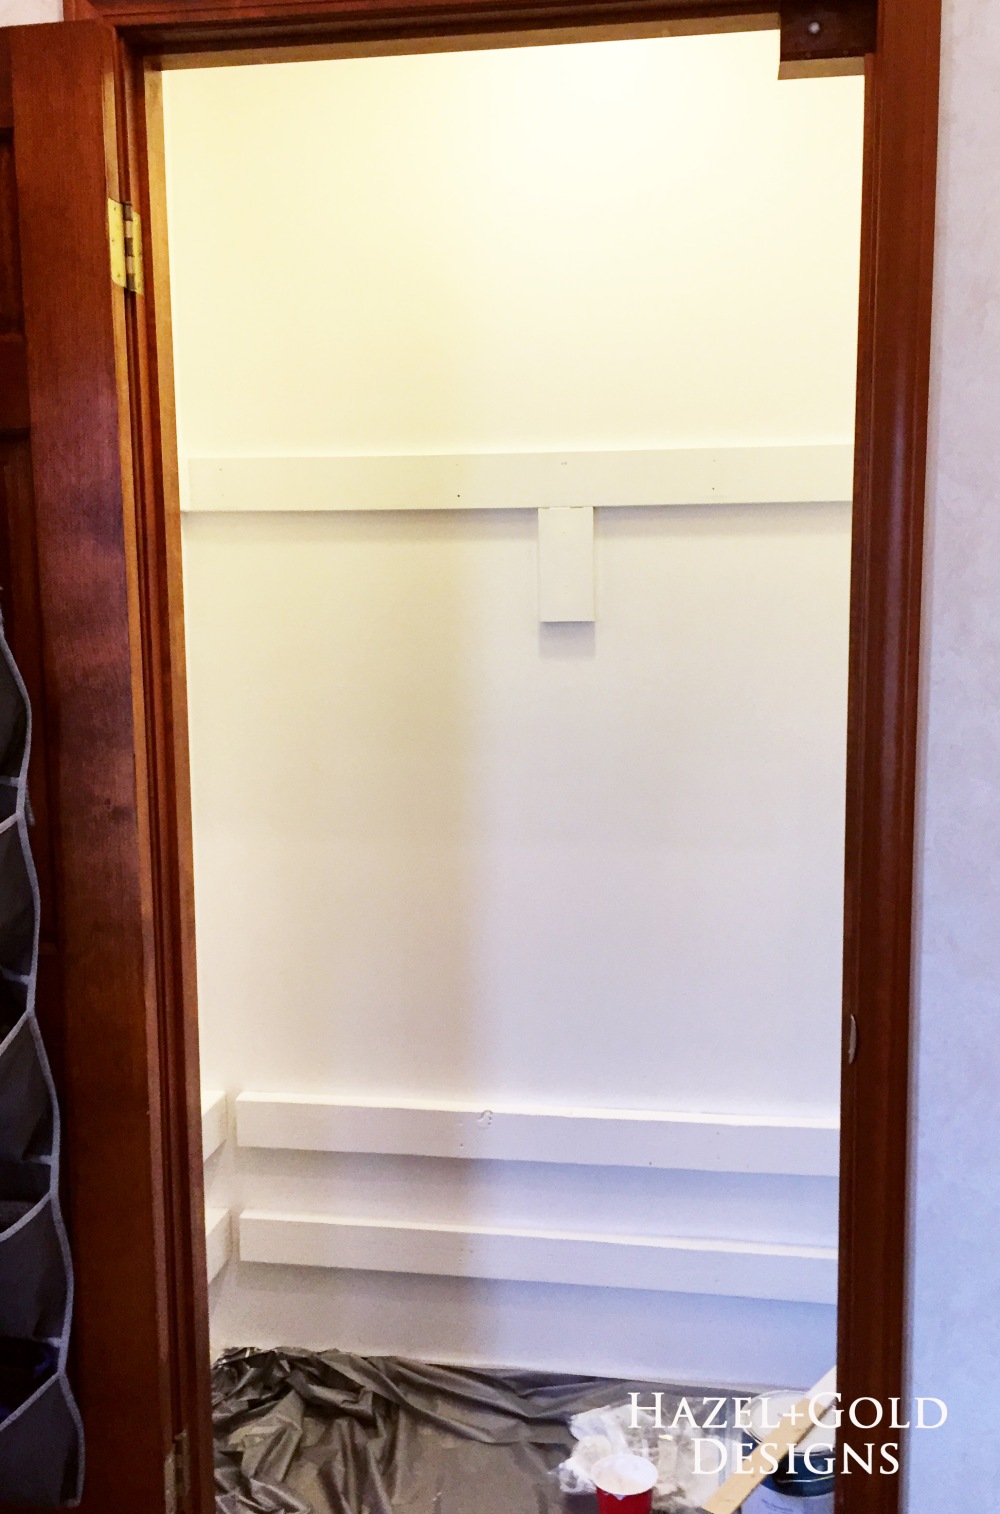
Once the supports were installed, we painted the entire closet white. I happened to have this from another project. While I waited for the paint to dry for a couple hours, I also went down to my workshop and found some 2×12 boards for the shelves, and stained them dark walnut. You’ll see them soon.
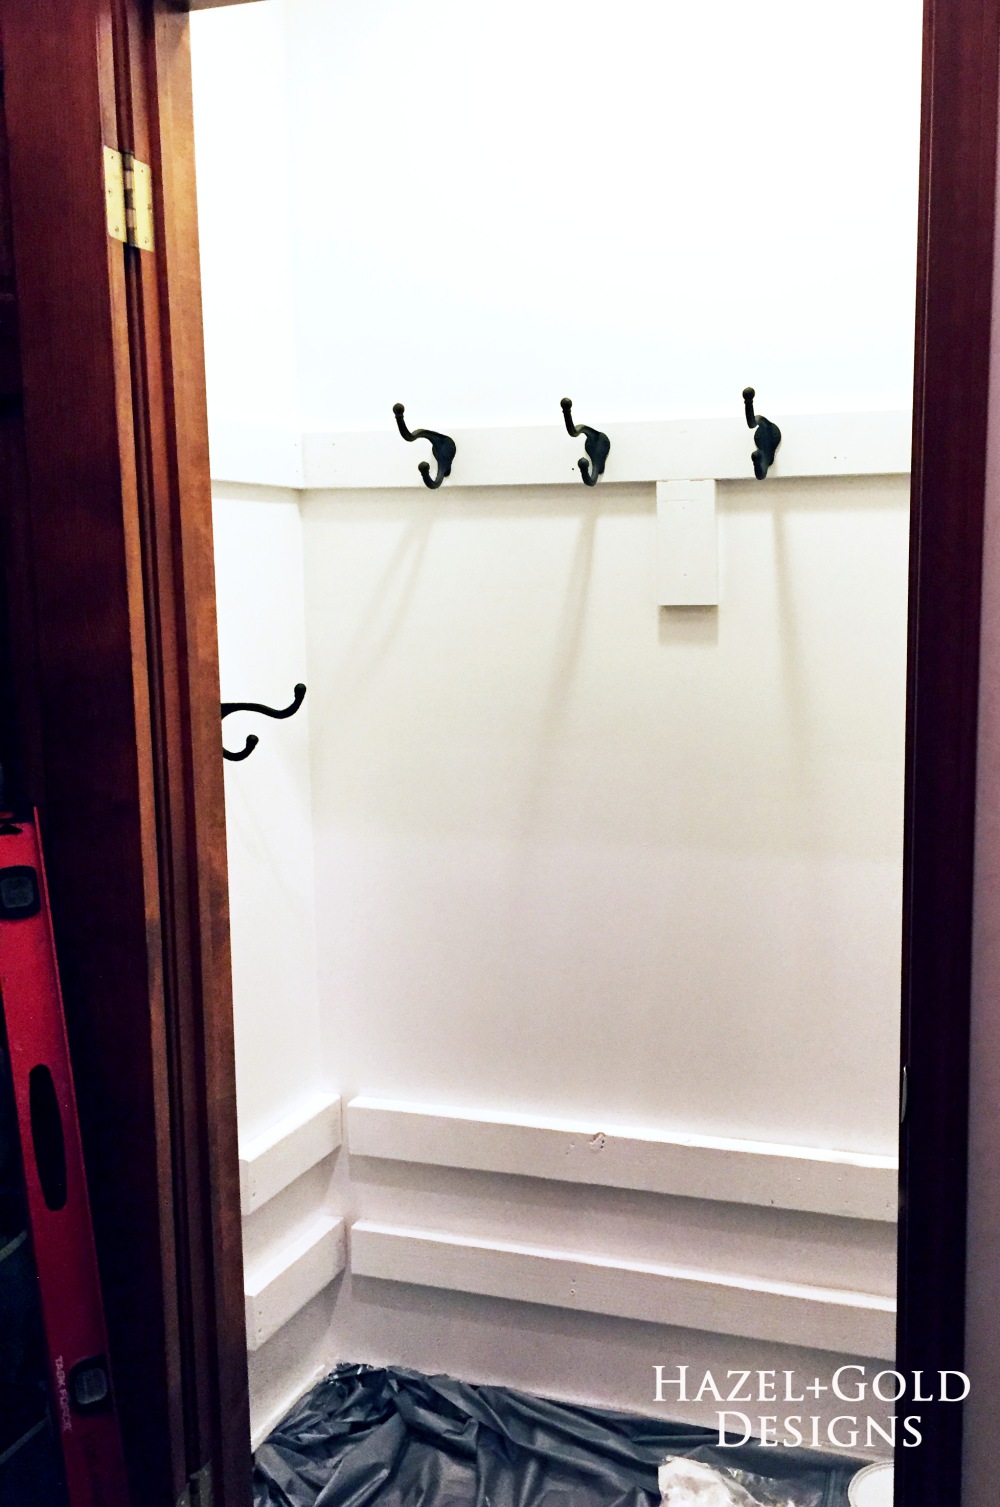
After the paint dried I installed the coat hooks. I got these hooks at Hobby Lobby and absolutely love how large they are. Each person in our family of six has a hook, and all of them hold multiple coats, or for the kids, coats, backpacks, and snowpants. The coats do touch the top of the shoes on the top shelf, but really, it hasn’t been an issue.
Now that the supports were installed, we inserted the shelves and added two screws from the top, connecting them to the supports. Nearly finished!
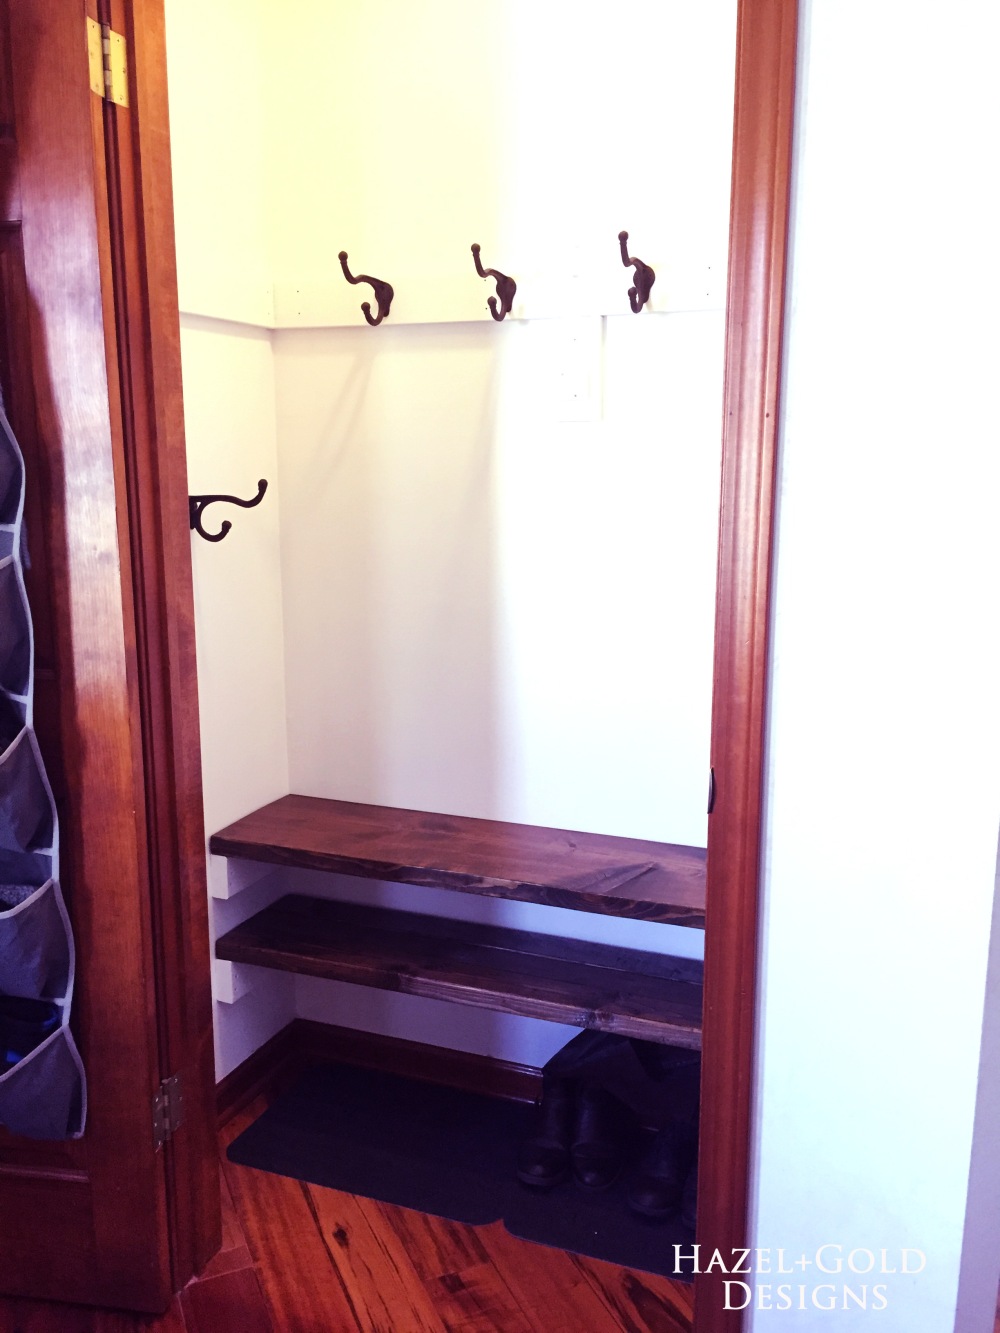
Here’s another angle, which shows the lower hooks that I installed for the littlest of our family. The two youngest aren’t quite tall enough to reach the rest. When they get older and are able to reach, we may just move them up to the same level as the rest and fill the holes in the drywall.

Okay, the final step was to install the top shelf. I actually waited to do this the next day, as I had to paint the shelf that was originally inside the closet white, and just didn’t have more time to do so that day. So, I painted and poly-ed the upper shelf and the next day added some supports just like with the lower shelves, and installed it! Then hung all the coats and shoes back in.

As you can see, on the door of the closet we have a hanging shoe organizer. We use this for the winter to hold hats, scarves, and gloves. It works perfectly and when it’s time to pack away our winter gear, I just take the entire thing off and put it in a storage bin. Easy peasy. With four kids things like this may not look the prettiest, but they sure simplify my life!
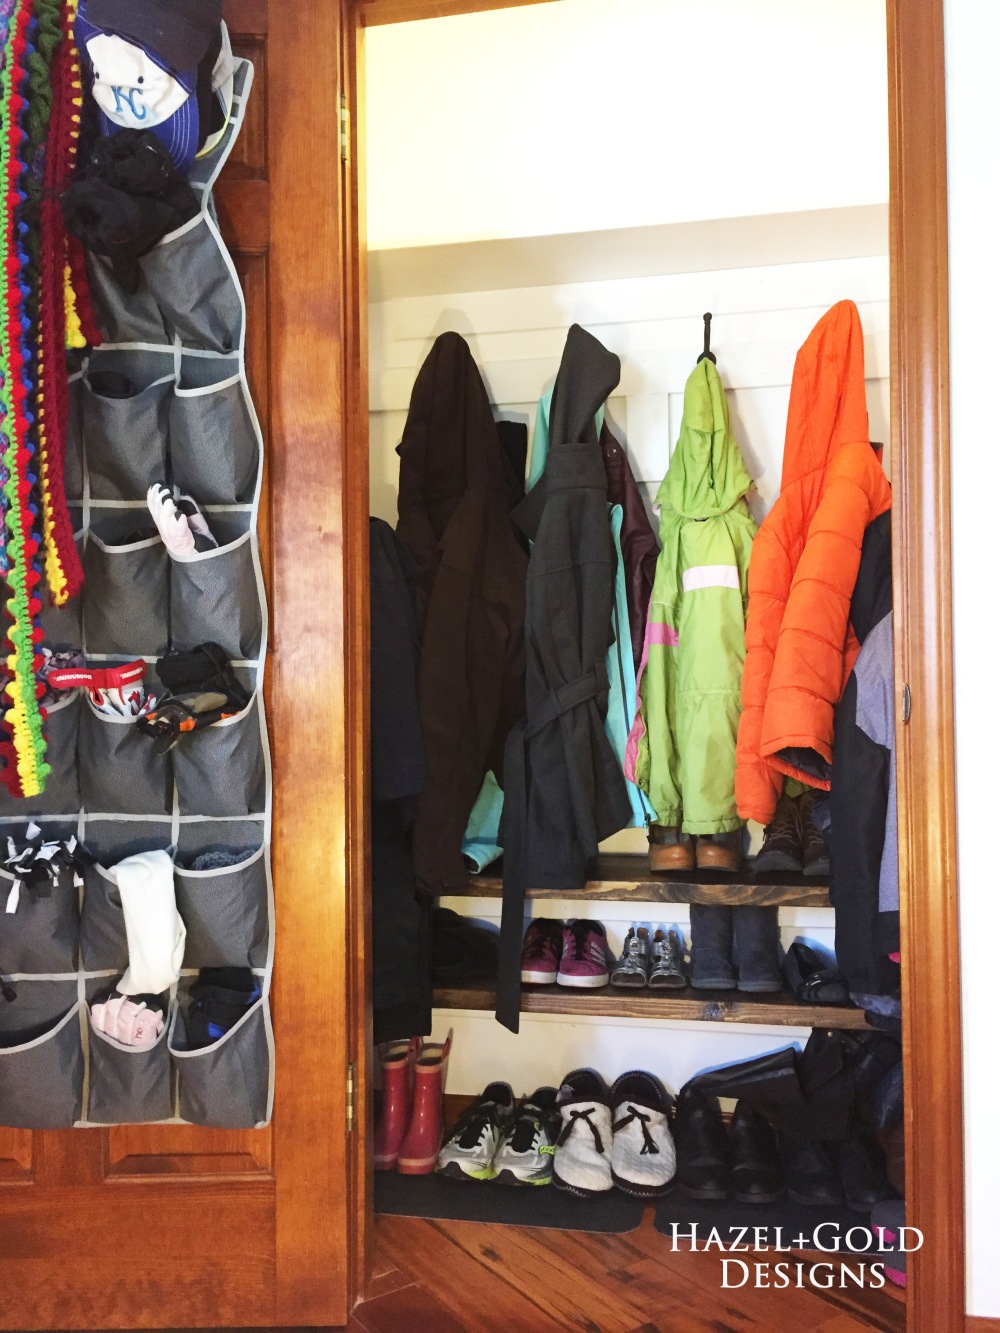
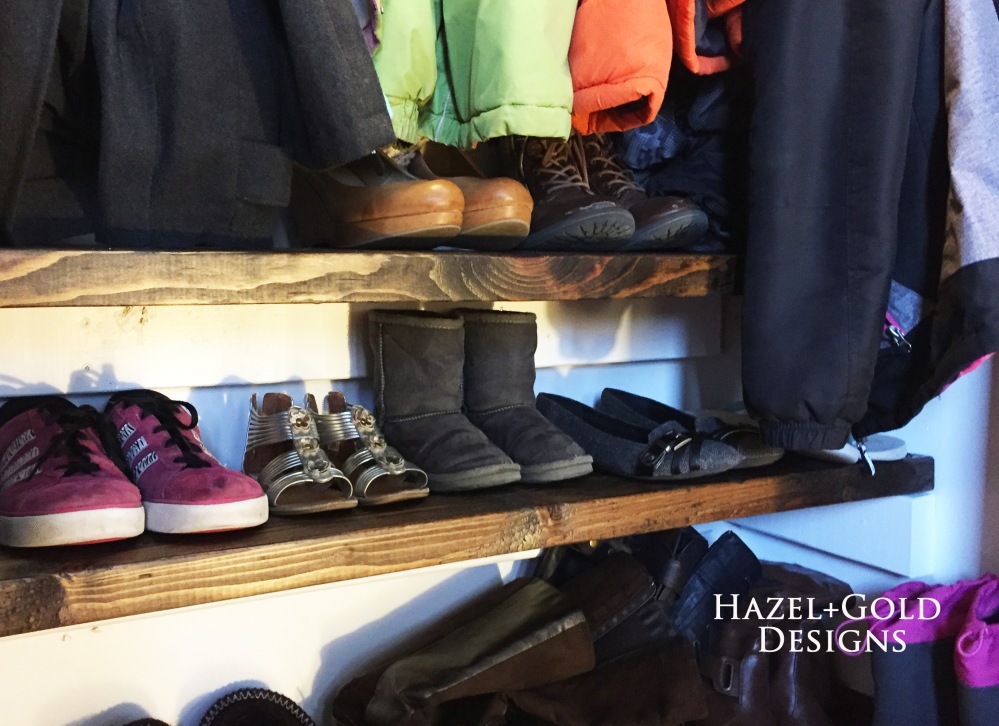
Close up of the shoe area. I realize this also isn’t incredibly pretty, but I really love the change and it’s a million times easier to find our shoes now!
Alright, I hope I answered all the questions, but feel free to ask any in the comments. I’m happy to note that I indeed had enough spare wood, screws, white paint, and stain so I didn’t spend a single penny more after buying those coat hooks. So, all in all, it cost me $12 to redo this closet. Not too bad!
I hope that if you have a closet that hasn’t been functioning well for you, this gives you the inspiration to take some simple steps to make it a bit more functional for your household. All our needs are different, but you can do it! Organization is a great thing!
If you like this project, please help me out by Pinning the following image on Pinterest! Thanks!

Thanks again for stopping by! Check out some of my other reno-on-a-tight-budget posts!
–Sheri

That looks so great! And I’m sure it functions much better, that’s the most important thing for a busy family!
LikeLike
SWEET!
>
LikeLike
Such a great use of space! Nice job 🙂
LikeLike
Wow! Turned out great! Love a quick organization project!
LikeLike
Great ideas! Love the shoe bench the best but what a great project!
LikeLike
Looks so much better and I’m sure you are enjoying the organization!
LikeLike
Yes indeed! And one worry I had would be that my kids would still just throw things in there, but it’s so easy now that even THEY are keeping it organized. A true blessing to me!
LikeLike
Looks great – and I agree that hooks are much easier to use than hangers!
LikeLike